
Updated 10/26/2021
Please note, the Hub application is under active development. As such, text and screenshots may quickly become out of date. If you have any questions about current Hub functionality, please reach out to your Hub contact directly.
Navigating to the User's page
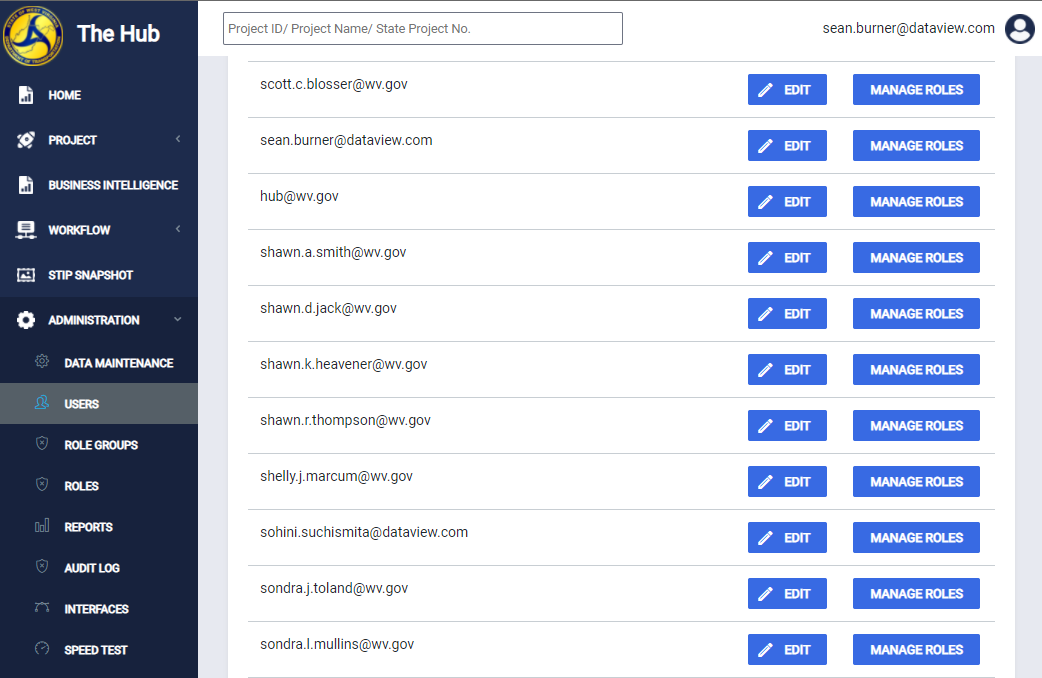
This page will allow Hub administrators to create new users or manage existing user roles and groups.
Creating a user
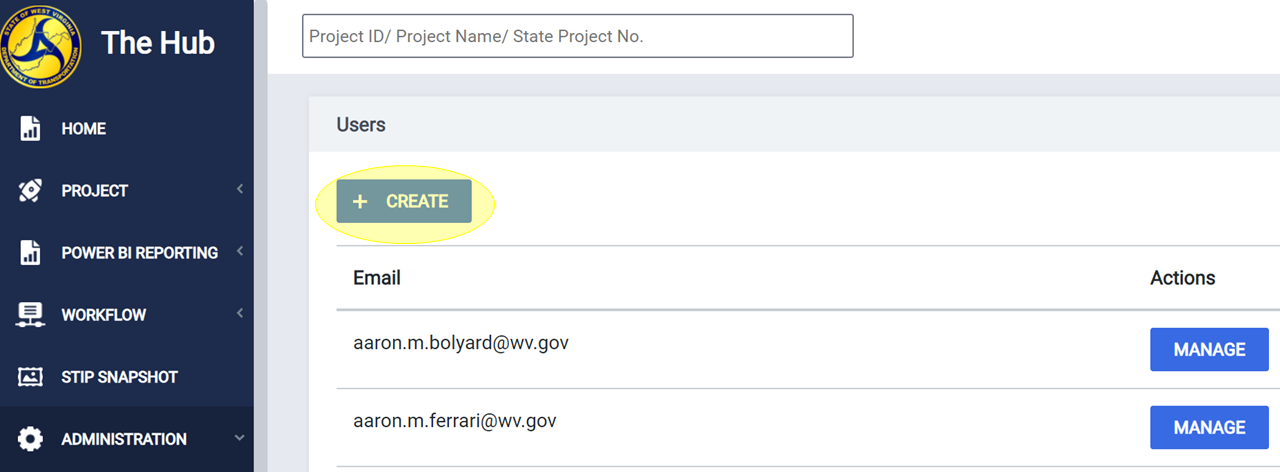
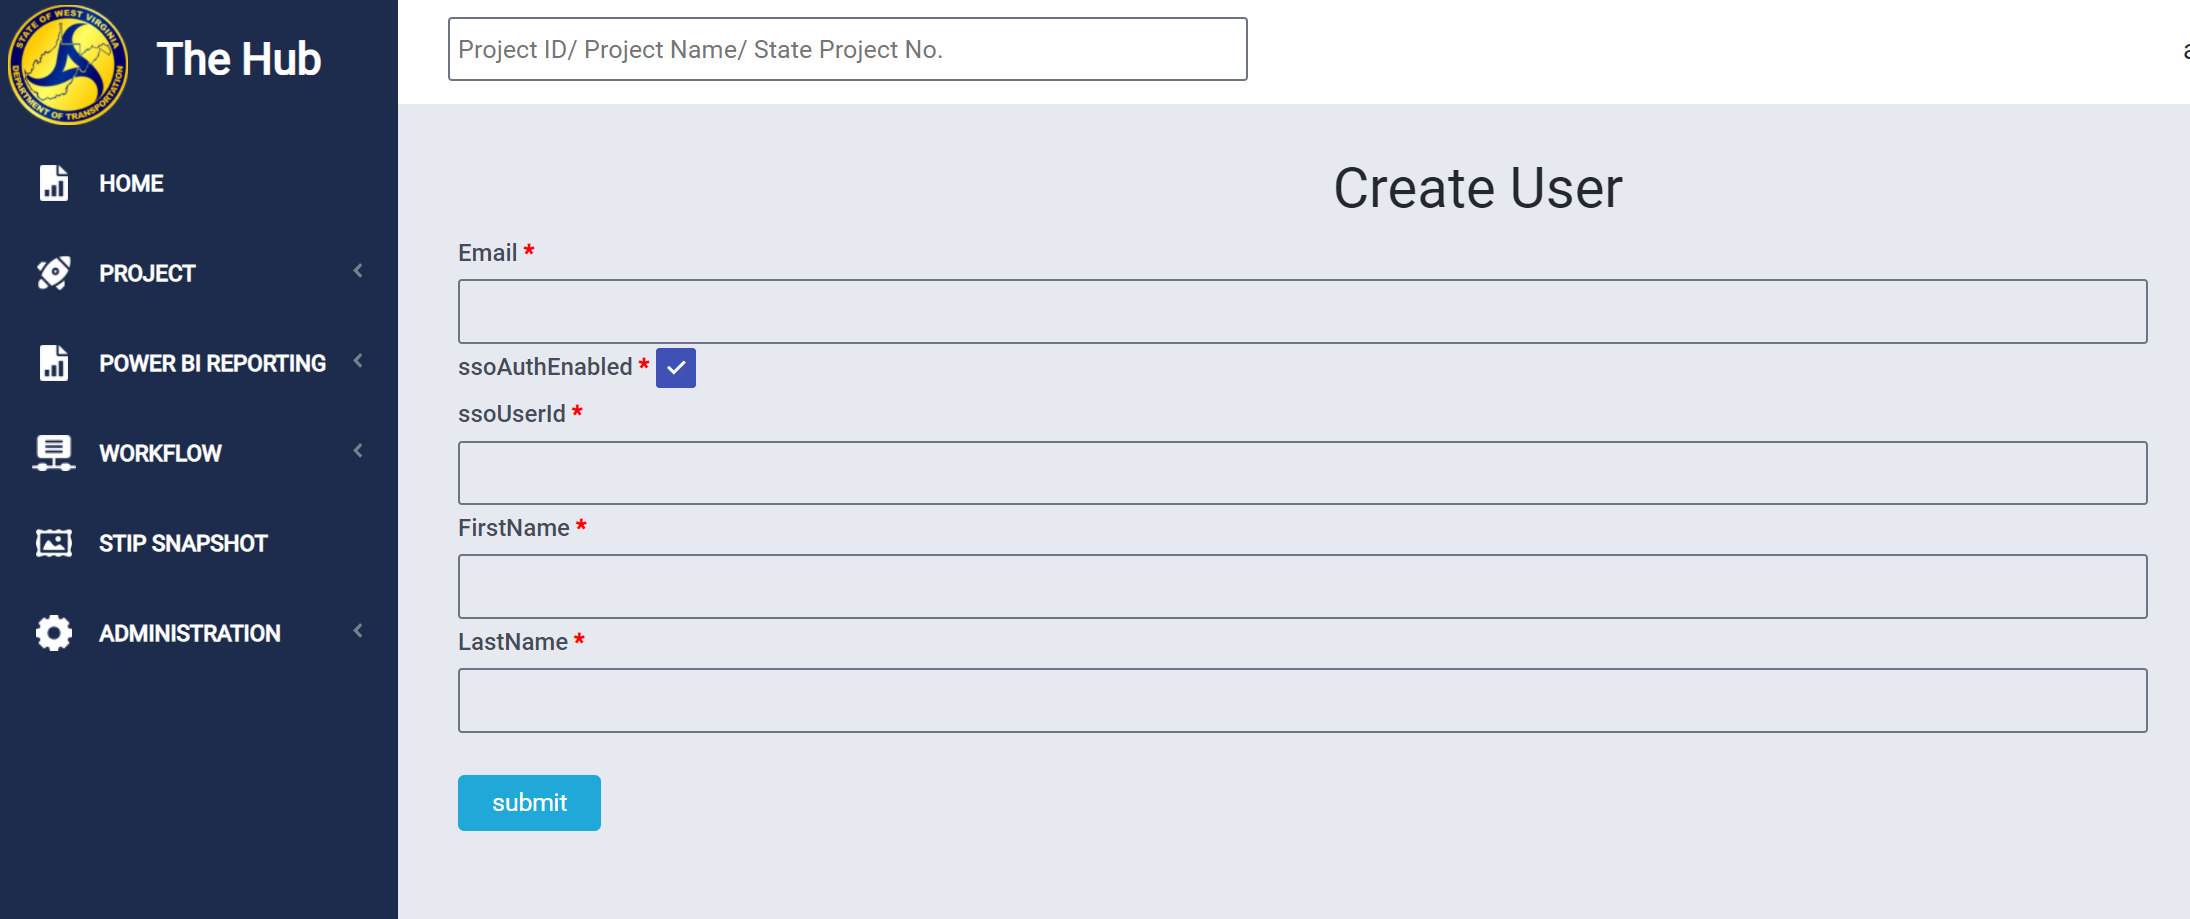
The "Create" button on the top left lets administrators add a new user to the Hub. Clicking this button opens a new page where they can add a user's email address, ssoUserID (which is required for users to access the HUB through MyAPPS), first name, and last name to create a new user. Selecting Submit will finalize adding the user to the active list of Hub users. However, role groups or roles will need to be applied before users can take any meaningful action in the system.
Editing a User
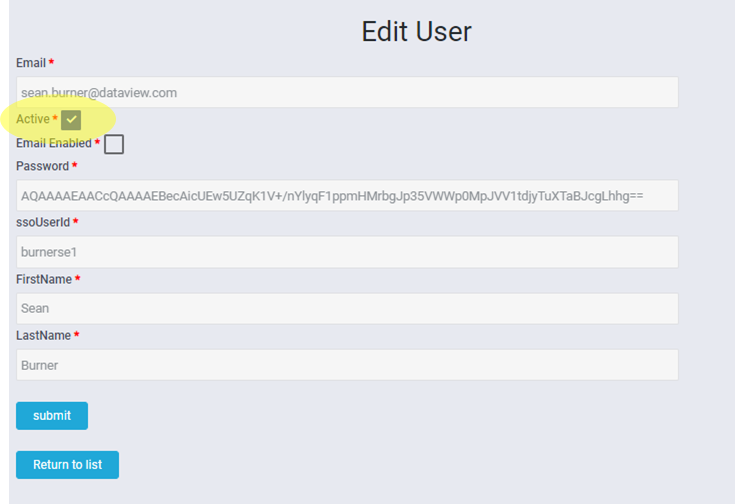
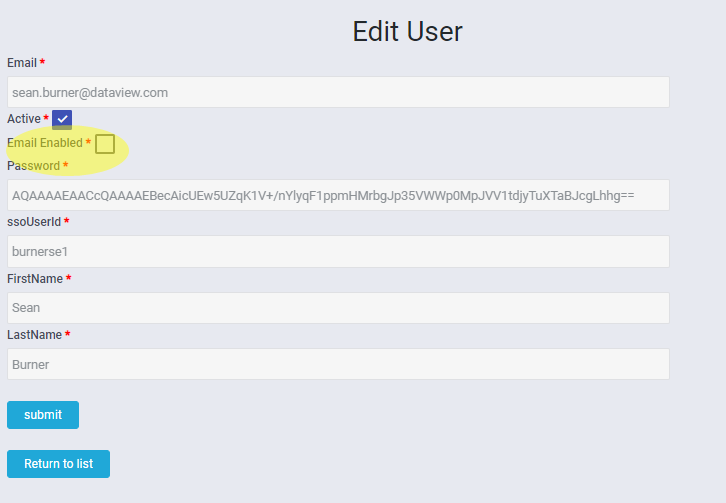
Clicking the "Edit" action on a user record will open the 'Edit User' page where admins will be able to disable or enable user access and email notifications.
 Enable/Disable User Access
Administrators can enable or disable user access to the application by clicking the "Active" checkbox. When checked, the user will have access to the application through MyApps. When unchecked, the user's access will be disabled, and they will not be able to login through MyApps.
Enable/Disable Email Notifications
Similarly, Administrators can enable or disable emails sent by the application by clicking the "Email Enabled" checkbox. When checked, the user will receive emails from the application. When unchecked, the user will not receive emails from the application.
Managing User Role Groups and Roles
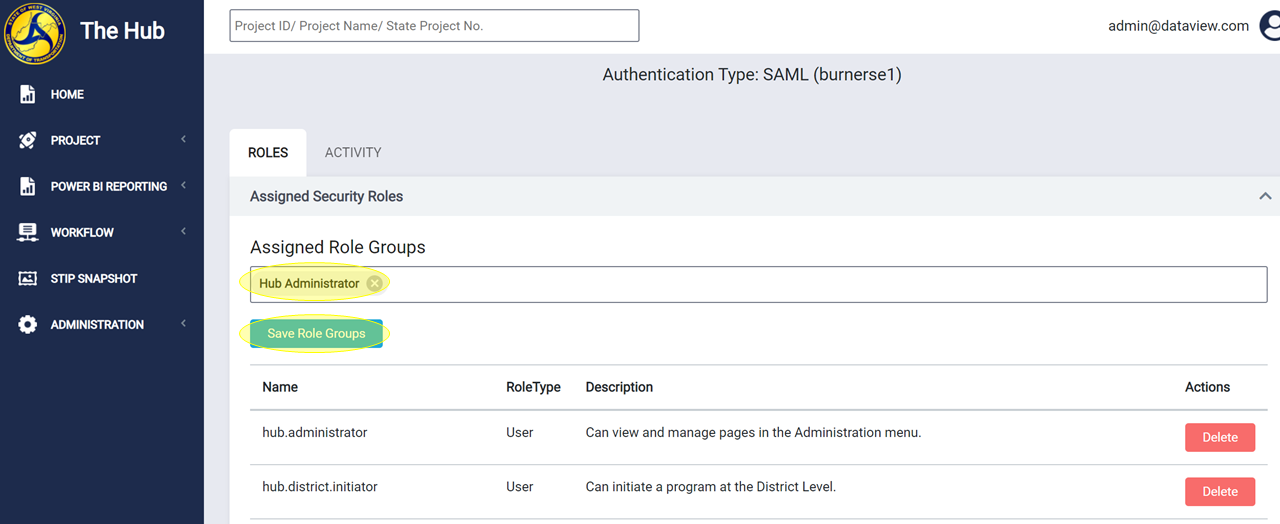
Clicking the "Manage" action on a user record will open the 'Manage User' page where admins will be able to add, update, or delete that user's assigned role groups and roles.

Admins can add, update, or delete role groups by using the 'Assigned Role Groups' multi-select dropdown. Once updates are complete, users must click the 'Save Role Groups' button to finalize any and save any changes. Updates should be reflected immediately, though users already logged into the system when role group updates are made may need to log out and back in before new permissions are applied*.
*Note: If a role group with workflow approval privileges is removed from a user while they are logged into the system, they will no longer be able to take workflow actions provided by that role group, even if a logout has not occurred.
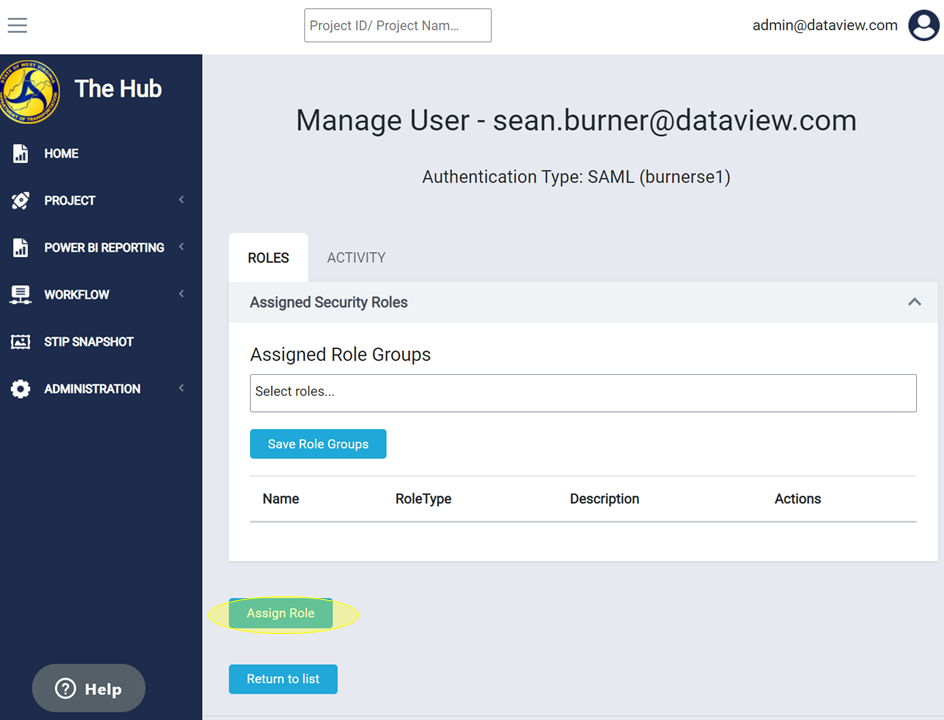
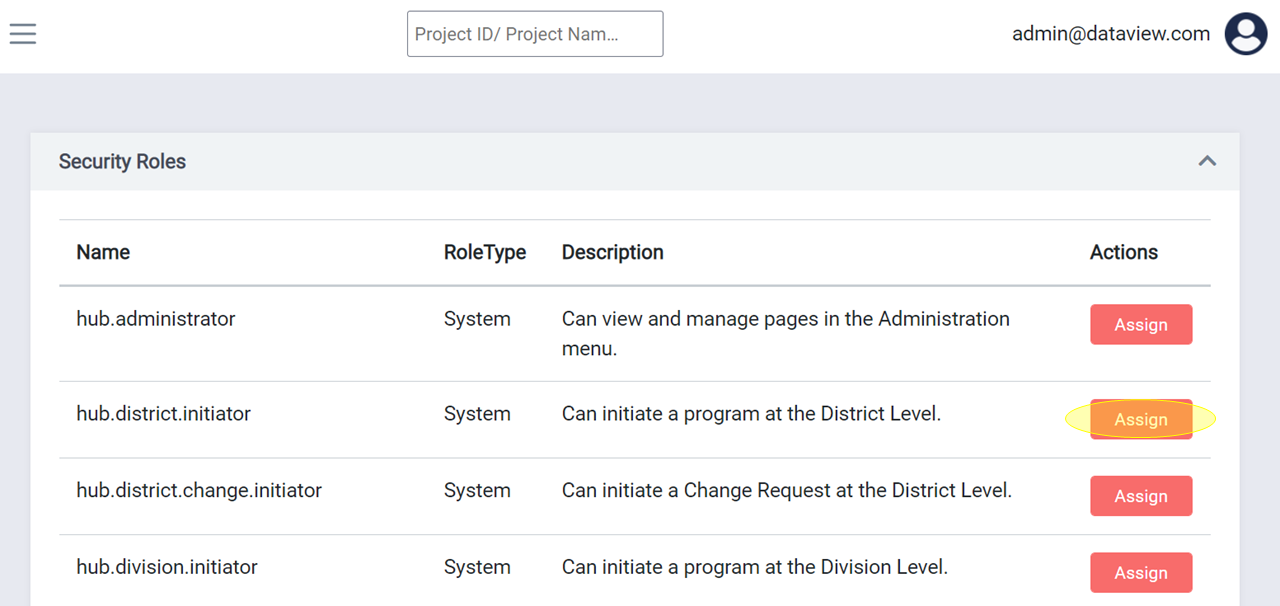
Selecting the 'Assign Role' button allows admins to assign individual roles by navigating you to the Security Roles page. Here you can select the 'Assign' action on a row to assign that specific role to the user.
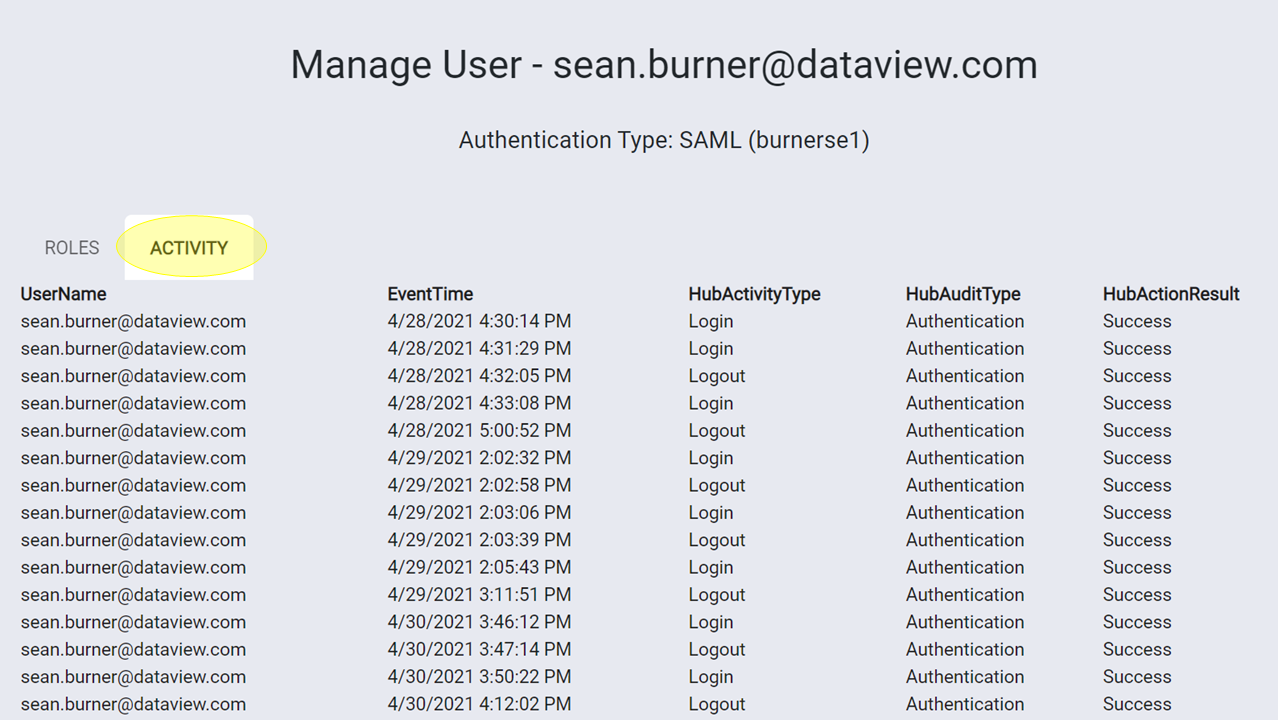
The 'Activity' tab on the Manage User page allows admins to view the system activity log for that user.
Nightly scheduled process populates the action needed inbox in Workflow.
Whenever a new user is given a new role or is taken away with the existing role, then the changes to the project workflow, phase workflow, change workflow and schedule workflow will be seen only after the Nightly process run. The user with the updated role will be able to take any action only after this Nightly process runs.
Comments
0 comments
Please sign in to leave a comment.